Wednesday, November 14, 2012

Santa Bow Tutorial

***Please click here for the Really Reasonable Ribbon Hop***
Good Morning!!!
Remember this super duper adorable little girl from yesterdays hop???
LOL...well...we aren' focusing on her...we are focusing on the bow in her hair!
If you can make individual bows, You can make THIS bow!! 
 Here is a photo of your materials...the only thing missing from the photo is the ribbon slide that I used for the center of the bow.  
Materials:
cotton crochet thread, stiffen stuff spray
scissors, hot glue and a lighter to heat seal your ribbon
your clip of choice ( I use french clips)


Now, once your have your material gathered, you will begin your bow.  
If you click on each image, it will have instructions for you for each step along the way along with the matching photo.  **You will notice a round ribbon slide in these photos, only because Dummy Me ran out of squares before I remembered to take photos!  I do recommend the square ribbon slide...it makes the look of Santa's belt much more accentuated.


And as always, if there are still ANY questions, please feel free to ask and I will help in any way that I can!  Have a wonderful Wednesday!!
Misty

Tuesday, November 13, 2012

Quick Quotes and Clear Scraps together!

***PLEASE SCROLL DOWN FOR THE REALLY REASONABLE RIBBON HOP***

What a wonderful combination of two companies!  These products fit so very well together!  For my project, I used the Lacey Mixable 8x8 album from Clear scraps along with the Cracklin' Rose Collection from Quick Quotes.   I admit, I have never done one of these albums before this, because I just prefer to work on my 12x12 layouts for my albums.  This was a nice change from the norm and I LOVED DOING IT!

I started with covering my chipboard pages with the paper from Quick Quotes.  I knew that I wanted those completely covered so that I could start my embellishment process.

My cover page of my album is kind of plain when it stands alone... just the work JOLLY and a wreath made from pine-look pipe cleaners.    BUT...when the album is closed, the first page looks gorgeous!  You can see the velum poem peeking through...and the flowers  I love the way the pages together create a masterpiece!

I used the vellum poem "Christmas" and I inked the edges with Limeade Powder Puff Inks.   I tossed in some flowers and leaves to help adorn the page a bit.
I went page by page, adding vellum, inks, flowers, paints and photos.  I chose to use a random assortment of my favorite photos from Christmases past. 
The chipboard 8x8 Christmas tree assortment was one of my favorite additions to my beautiful album!  
Below are the pages of my album....each one different, each one unique. This was truly one of my most favorite projects ever!


By the time I had finished the album, I realized that I had created a masterpiece that I will cherish for years to come!
Thank you for taking time to look at my project today!  Have a wonderful week!

Products:
Lacey Mixable 8x8 album from Clear scraps
Cracklin' Rose Collection from Quick Quotes
chipboard 8x8 Christmas tree assortment
Christmas vellums
Powder Puff inks
Birthday Bag o Chips


Hop Along with RRR!

Hi there everyone!! 
Welcome to the November edition of the Really Reasonable Ribbon Blog Hop!
If you came to my blog from Vivian's blog then you are on the RIGHT TRACK!  If not, then you might consider starting over at the beginning at the Really Reasonable Ramblings Blog and make your way through.
It will be worth your while!

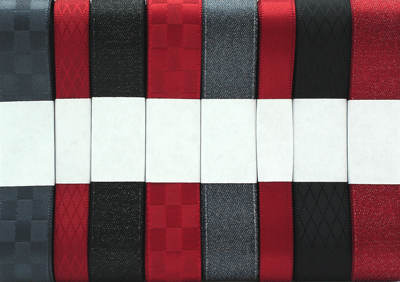
Check out this Gorgeous Assortment that Bonnie has put together for the Ribbon Club!

I absolutely adore the elegant look of this assortment!  I knew immediately that it would be perfect with a touch of white tossed in!  I also added in a yummy~licious looking candy cane and viola...
The PERFECT CHRISTMAS BOW!

  
FRONT VIEW:

SIDE VIEW:

And just because I am IN ABSOLUTE LOVE with the Christmas Holiday and all things Santa... I have been dying to make a santa inspired ruffle ribbon bow!  
So, here is my munchkin wearing her Santa Bow: 

I used the charcoal glitter ribbon from this month's assortment for the center "belt".
The more I look at this bow, the more I want to make more of them!  
It was  so easy and suuuuuper duper adorable!

I Hope you have enjoyed my double bow feature this time around! 
And...just for fun...and a little Christmas bonus...
I will do a photo-tutorial on the Santa Bow tomorrow! 
Make sure to come bak here or to the RRR blog for that! 
Now it is time to hop on over to Ginny's blog to take a gander at her inspiration!  
I'm sure you'll love it!
Thanks for visiting and have a magnificent week!

Thursday, November 8, 2012

Club Quick Quotes

Happy Thursday everyone!  It has been a LOOOOONG week for me already!  

Today, I want to share with you a  little Christmas itemthat I did using the November Q-Club kits and some of my handy dandy Powder Puff inks!

This first project is a stocking.  Just a paper stocking of course, but functional nonetheless.
Here is a close up of the flowers.  You can see that I have used ample amounts of maraschino cherry powder puff ink on these flowers. 
  You can also see in this photo that I have used green with envy and blue moon inks to accentuate the stocking and its top "fluff" portion. 

Here is the paper stocking completed.  It is fully functional and can be used as an alternative to a holiday card, or as gift card holders, or even just to give out as a class gift before the holidays to all of your munchkin's friends!
I sure hope this inspired you all today to get busy creating! 
Thanks for visiting!


Materials used:

Sunday, November 4, 2012


***Scroll down for the Quick Quotes/Helmar Blog Hop***

Hi Y'all!  And Happy Sunday!
Today I want to share with you the first of my annual hand made ornaments.
Every year, I make a few ornaments for family, friends, and of course...myself! 

This one is my "Country Rose" ornament.
All I do is fill the inside of the glass ornament with various lengths of ribbons.
Then I put the hanger top back on and decorated the outside. 
White seam binding makes a nice contrast on the top of the ornament secured with a golden button and dark brown hemp while red plaid ruffle ribbon creates the loop holder. 
 
I hot glued this jute rose to the top of the ornament and voila...a super simple Country Christmas Ornament to keep...or to GIVE!
 I hope I have inspired you today with this super simple ornament idea. 
Bonnie at Really Reasonable Ribbon has THE BEST RIBBON selection ever...so go visit her!
Go pull out your ribbon and get to creating today!


Wednesday, October 31, 2012

HAPPY HALLOWEEN! Hop with QQ and Helmar

Welcome to our little Hop~  And Happy HALLOWEEN!
If you came to my blog from Barb's Beautiful Blog...then you are on the right track!

Today, I want to share with you a couple of things that I made using Quick Quotes products and Helmar adhesives.
I know today is Halloween, and I do have a little table decoration to share with you...HOWEVER....

First up is my Thanksgiving card.
The outside says, "I am Thankful for You."
The inside says, "I am Grateful for Us."
A quote by Patsy Gout that I cut in half to use each piece separately. 
Thanksgiving is my FAVORITE holiday of the year.  It is a time to reflect on what we are thankful for and to count our many blessings. 
I made a 3 layered pumpkin...the layers have the helmar ZapDots for dimension, and the Vellum Spray to adhere the vellum quote to the card stock, and the 450 Quick Dry to glue the mini roses and the leaf vine in place.   Let me just say...these products are wonderful! .  I even used Maraschino Cherry and Mocha Mama Powder Puff inks to liven up the edges of my card.

 Here is a close up of the vellum Quote.  You can see that it is 100% in place, and there is no stick residue to be seen through the vellum.  I love that spray!  
Here is a Halloween table decoration...a witch's hat that I made using the Dreamscape deep purples along with the oranges from the Halloween collection.  I used the same 3 products listed above to get this nifty little project put together.
I just want to say...I will never use another liquid glue again...450 quick dry is absolutely amazing.  Honestly.  I LOVE it.     

Here is a close up of the flower that I made using the Halloween 300 paper and the helmar 450 quick dry and some purple passion powder puff inks.  You can see that I tossed in a bit of ribbons and roses to add some festiveness to this super scary witch's hat.  :)  LOL.  
I LOVE Creating fun decorations for Halloween, and I must say, I had a BLAST using Quick Quotes and Helmar this time around!  I hope I have inspired you all today!
Now head back on over to the Quick Quotes Blog and leave us a comment there, too~!
Thanks for hopping along with us today!  

Materials Used:
Helmar adhesives
Really Reasonable Ribbon ribbons and trims.
Prima flowers and gems.

Saturday, October 27, 2012

Dream...Cherish...Believe

Happy Saturday to Y'all!
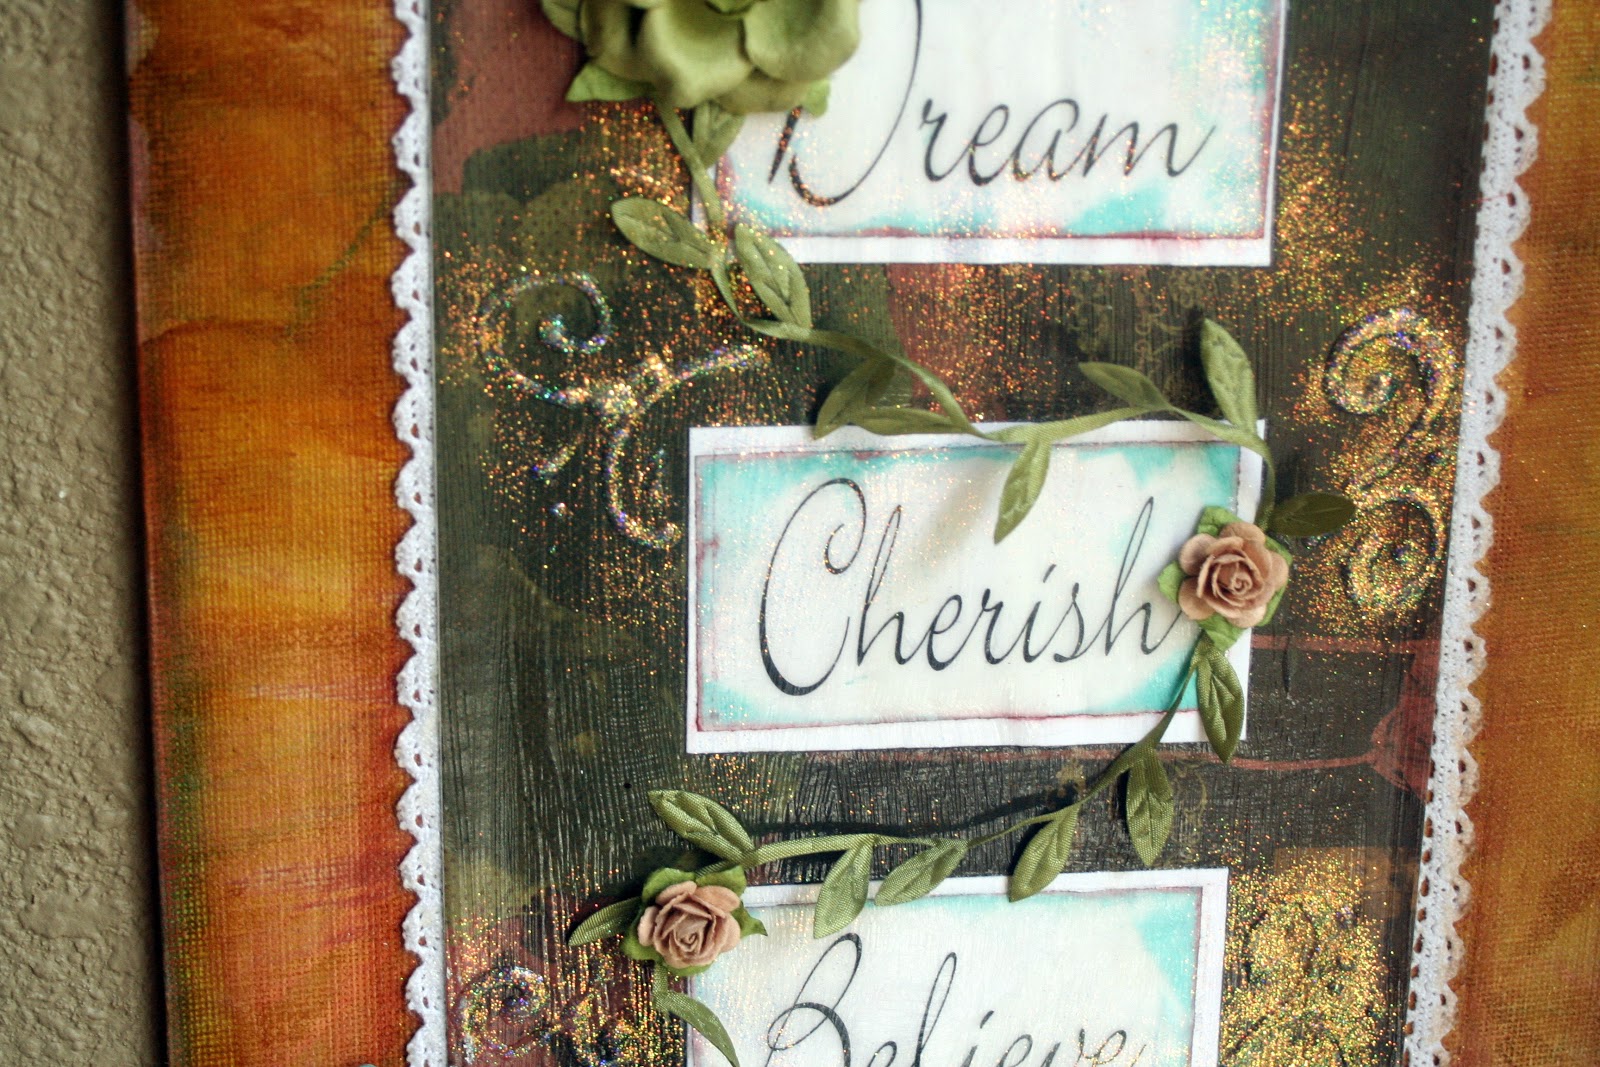
I have a little canvas project to share with you today using the Cracklin' Rose Collection , some vellum, and some lasercuts.   I made a beautiful little wall hanging that I fell in love with.
As you all probably know by now, I am ADDICTED to quotes, inspirational sayings, and words of wisdom.  Patsy and the ladies at Quick Quotes feed my need for these with all of the beautifully designed vellums.

Here is a canvas wall hanging:
I used some alcohol inks to create the back ground effect, and inked all of the edges with powder puff inks.  I used the lasercut bird and feeder from the Garden Bag-O-Chips inked with Tahiti and Mocha Mama Powder Puff Inks for my embellishment.  I used the Sentiments Itty Bitty Vellum Box set and I inked the edges with Tahiti and Mocha Mama ink and mounted them.  
 The Cracklin' Rose 100 paper was the ABSOLUTE perfect paper for this project.  the rose images, the burgundy and green hues...all so very gorgeous and dreamy.  Once everything was in place, I covered everything with Mod Podge to help protect it all and keep in looking beautiful.  
This project has become a permanent fixture in my hallway.  I look at it every day and these three little words inspire me and start my day out wonderfully.  

I hope I have Inspired YOU ALL today to create something Meaningful and Beautiful today! 

Products Used:
lace from RRR
mini roses
glitter
alcohol inks
Mod Podge


Monday, October 22, 2012

Magic and Wonder

Happy Monday to you all!
I don't know about all of you, but I am soooo ready for the holiday season to get here!
I have been listening to Christmas music lately as I create and sucking on peppermint sticks.  LOL
I have been so very inspired that I created a holiday layout using Cracklin' Rose...but TOTALLY not what one would expect from this gorgeous collection.  I used the creams and whites of the collection and added in bright reds and greens for the accents to help create this whimsical page featuring my daughter and her BFF from last Christmas.

I used acrylic paints to paint the laser cut Christmas tree and sprinkled it with glitter...then used Green with Envy Powder Puff ink to ink all of the branches.  For the gift package, I used red acrylic paint for the bow and only the Green with Envy ink for the package border.

Since the collection features deeper red hues and I was shooting for bright red, I created a couple of lollipop embellishments with ribbon to help accent the layout. This is the Sheer Braided trims from Really Reasonable Ribbon in red and white and parrot green and white.  They make a PERFECT lollipop don't you think!??
I hand cut these stockings from The red notecard on the Summer Samba 500 cut-outs page and I added a touch of crochet lace from RRR to the tops and inked with Midnight Confessions inks.


I fell totally in love with the effect that I was able to achieve using this collection.  One look at the collection and one would think classy, elegant, beautiful, gorgeous, ANYTHING but whimsical.  What a magnificently versatile collection this truly is! Thank you for visiting me today!  Have a WONDERFUL week!

Products Used:
Cracklin' Rose Collection 400 & 500
laser cut Christmas tree
Green with Envy Powder Puff 
Midnight Confessions inks
Summer Samba 500
ribbons from RRR


Saturday, October 13, 2012

RRR October Hop!!


Welcome to the October edition of the Really Reasonable Ribbon Blog Hop!  
If you came to my blog from Patti's Blog, then you are on the RIGHT TRACK!  If not, then you might consider starting over at the beginning at the Really Reasonable Ramblings Blog and make your way through.  It will be worth your while!

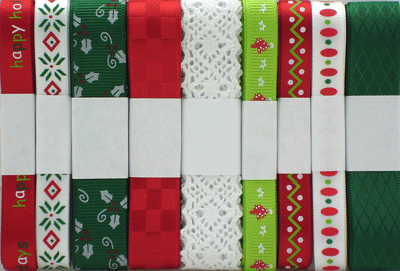
Check out this Gorgeous Assortment that Bonnie has put together for the Ribbon Club!

I LOVE Christmas!  And this assortment was the perfect thing to get me all KINDS of excited about the upcoming holiday!   When I started creating with these ribbons, I decided to crank up my stereo with Christmas tunes and light an apple pie scented candle...LOL.  My family thought I was NUTS!  But hey...they think that often!  LOL.

Here is the bow that I created this month...

And here is a side view of all of the layers.  I am addicted to layers lately! 
And my beautiful model who always LOVES to display the newest "Bow of the Month"

Even though it is October, Skye could not WAIT to wear her newest bow to school!  She is so funny!
Your next stop in the hop is at Dawn's blog.  I am sure she has some tid bit of gorgeousness for you to see!  
Oh, and the photo below is me modeling my bow...
Bet'cha didn't hink I would do it did ya, Bonnie!!??  


Have a Magnificent Weekend!  Thanks for visiting!

Tuesday, October 9, 2012

SALE! SALE! SALE!

Take a trip on over to the Really Reasonable Ribbon site and check out the 3 day sale that Bonnie just posted!  The details are on the blog, and the site is packed FULL of ribbony AWESOMENESS!

Just check out this month's Ribbon Club Assortment!  Isn't it GORGEOUS!!??

Head on over and take a look!  The sale is for only 
THREE DAYS!!!!

Monday, October 8, 2012

Happy Fall Y'all!

And so it begins!
The weather here in Texas is FINALLY starting to feel a bit like Fall!
I LOVE LOVE LOVE the autumn season...the colors, the smells, the crisp cool weather, and the holidays that come along with the season are also up there in my favorites!

Oh, and did I mention that the activities in the fall are some of my favorites, too?  Baking pies, pumpkin carving, oh and DEFINITELY playing in the leaves!!!!
Here is a layout that I did using the Copper Kettle Collection:


I used random bits of different QQ papers to punch out my oak leaves.  I used Summer Samba and Tin Type bits coated with Crystal Stickles and sprinkled them over my layout to look like they are blowing in the wind. I used an older QQ velum Quote that has been updated.

 I used the laser cut Whimsical Tree  and painted it with brown acrylic paint mixed with a crackle medium.  As it dried, I sprinkled a bit of glitter on it to help achieve the coppery look. I inked the edges of the tree and the page with Mocha Mama powder puff ink and then set to applying my leaves.   I also trimmed off some of the branches that hung off the side of my layout and repositioned them to the bottom corner. Don't be scared to cut your die cuts, vellums, or any other embellishment to fit your own needs!  Make it YOURS!

Don't forget to pull out your camera and snap some pictures of those fall leaves and activities.  Then, head on over to the Quick Quotes store and shop for the PERFECT papers and embellishments! 

Have a Happy Monday, and Happy Fall Y'all!!!

Supplies:
Ranger stickles, glitter, AC thickers,  
metal embellishment from Momenta


Friday, October 5, 2012

October Challenge at Quick Quotes!

FOR THE HAMPTON ART/ REALLY REASONABLE RIBBON BLOG HOP PLEASE SCROLL DOWN....THANK YOU!
Happy Friday to everyone!  I hope you had a wonderful week that leads you into a fantabulous weekend!  If you feel like making it a CRAFTY weekend, (hint hint)  then I have the perfect project for you!   Take this GORGEOUS sketch created by our very own Karan Gerber, and create a layout based on it! 


There is one rule....you MUST include a quote. 
Now, I know that some of you do not have the Quick Quotes vellum quotes, so a quote in any other fashion is acceptable.  You will notice that my quote is printed directly onto my photo in my example.


This layout uses the Dreamscape collection.  OMGosh it is a gorgeous collection!!  The purples and blues are magnificent!  I used my cricut to cut the die cut "trellis" shape and the petals for the flower.  I tossed in a bit of lace and mini roses to create the outdoorsy feeling with a touch of elegance.  Karan's sketch was a perfect inspiration for this! 

Supplies:
Cricut Machine
Martha Stewart Punches 
Prima Mini Roses
AC Thickers
paints & glitter,

Tuesday, October 2, 2012

Blog Hopping!

Welcome to the Really Reasonable Ribbon/Hampton Art Blog Hop!  

If you came to my blog from Dana's   beautiful blog, then you are on the right track!  If not, you might consider starting over at the beginning of the hop at the Hampton Art Blog and hopping on through to the end.  There are PRIZES involved!  So you will want to leave a comment on all the blogs in the hop!  Yes, we know there are several blogs, so you will have a full week to complete the hop.  How COOL is that!!!???  

This hop holds a special place in my heart, because my very own step Mom had breast cancer 2 years ago and she is now a survivor.  It is not something that I would want anyone to have to endure...ever. It definitely taught me to say I LOVE YOU to certain people more often.  I tell my kids every single day, and always have...but Mom...Dad...?  Not so much.  I now make it a point to tell them often.

I chose to do a layout about my step Mom...and the HOPE that she never lost.  I used the Hampton Art Artsy Edges signature collection stamps to create the border in this layout, and I also added in several different ribbons and trims from Really Reasonable Ribbon for the layered look.   I also used the Pink Ribbon stamp and hung it from the "e" in hope.  It added the perfect finishing touch to this layout. 


Here is a close up of the stamps and the ribbons together.  You can see the seam binding, the lace, and the twine, along with the artsy edge stamps stamped in pink and the pink ribbon stamp.  


I chose to journal directly onto the layout, which is something that I normally DO NOT do.  I usually do hidden journaling or printed journaling, never handwritten directly on the layout.  In this instance, however, I felt that the truest form of love can be shown in my own handwriting. So I did. And I actually like it.  
I do HOPE that someday there is a cure for Breast Cancer.  
I also HOPE that it is sooner rather than later.

Your next stop in the Hop is at the lovely Blog of Britt.  
I HOPE this has inspired you, and don't forget to leave a comment at ALL the blogs! 
Have a wonderful week! Thanks for stopping by and visiting today!